0%

Choosing the best Bicycle Light in 2026 is not simply a contest of brightness. A powerful beam can illuminate a dark lane, yet perform poorly on a crowded street if it blinds approaching riders. Beam shape, side visibility, mounting stability, battery life, and easy controls all matter. So does the route.

Cycling engineer and author John Forester wrote, “Cyclists fare best when they act and are treated as drivers of vehicles.” That principle helps frame this guide: lights should help riders see and be seen while moving predictably among others. It is not a lighting-specific quote, and it cannot replace careful product testing. Still, it is a useful reminder. Visibility is part of communication.

This overview compares front lights, rear lights, and practical light sets for commuting, road riding, and darker paths. It considers measured output where reliable data is available, alongside real-use details such as whether a button works with gloves or a mount slips over rough pavement. Small details matter. A little too much, perhaps, is often claimed about raw lumens. Battery estimates also vary with mode, temperature, and age. The best choice depends on where and how you ride, not just the number on the box. Expect clear trade-offs, not one perfect answer.
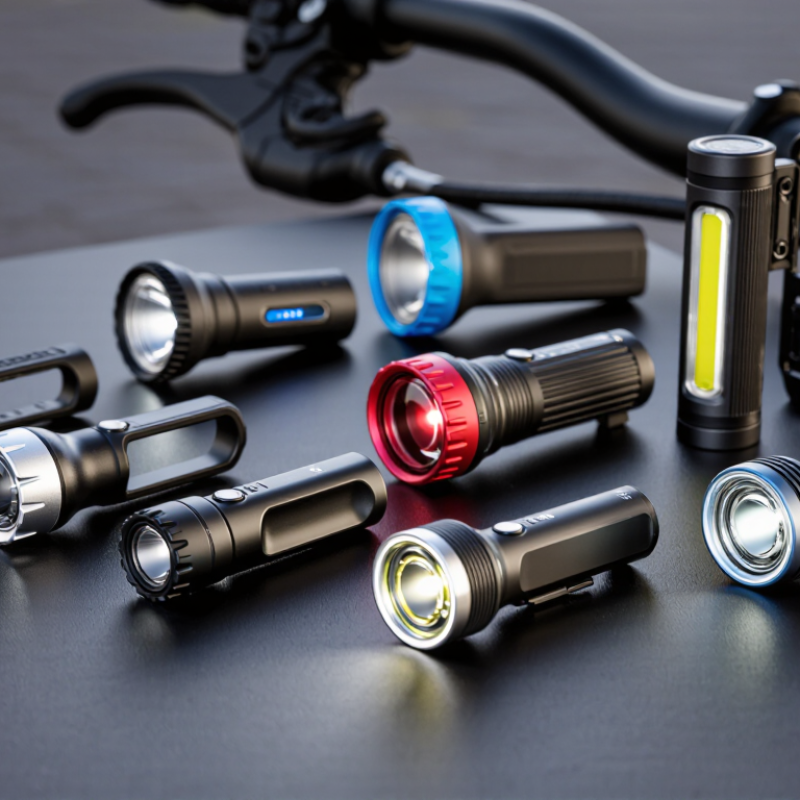
What Are the Best Bicycle Lights in 2026?

How Bicycle Lights Work and Why They Matter

Bicycle lights do more than make a rider visible; they help reveal pavement edges, potholes, and debris. A front light casts a beam onto the road, while a rear light helps people approaching from behind notice your position. Many lights use LEDs, which can provide strong illumination with modest battery use. Beam shape matters as much as brightness. A focused beam can light the lane ahead, while a wider pattern helps show hazards near junctions. Too much glare, however, can make it harder for others to judge distance. Small detail. Real consequence.

Light output is only part of the job. A secure mount keeps the beam steady over bumps, and a clear lens helps it remain useful in drizzle or road spray. Flashing modes can attract attention, but a steady beam may make distance and movement easier to read. I can’t pretend one setting suits every street; dark paths and bright, busy roads call for different choices. Check the battery before leaving, and aim the front light so it illuminates the road without shining directly into someone’s eyes. A light that is technically powerful but poorly aimed is not much help.

Main Types of Bicycle Lights and Their Uses

Bicycle lights serve different jobs, so one bright lamp rarely covers every ride. A handlebar-mounted front light should cast a clear beam onto the road, helping riders spot potholes, wet leaves, and curb edges. A broad beam is useful on unlit paths; a lower setting often suits well-lit streets. Aim matters. A light pointed into another rider’s eyes can reduce comfort and visibility.

A rear red light helps people behind notice a cyclist, especially in dusk traffic. Steady modes make distance easier to judge, while flashing modes can stand out in daylight. Some riders add small side lights or reflective details for visibility at junctions. Helmet lights follow the rider’s gaze, but they do not replace a stable handlebar beam. That distinction is easy to miss.

For context, the US National Highway Traffic Safety Administration recorded 1,105 bicyclist fatalities in its 2022 Traffic Safety Facts report. The figure does not show that lights alone prevent crashes, but it underscores why visibility deserves care. For commuting, a front-and-rear set is a practical baseline; for rural routes, longer battery life and a wider beam matter more. Dynamo lights suit frequent riders who want power without regular charging. They can be less convenient to install, though. There is no perfect setup. Check the beam from a rider’s position, not just against a bright wall.

How to Compare Bicycle Lights in 2026

Comparing bicycle lights in 2026 means looking beyond the largest lumen number. Lumens describe total output, but beam shape decides where that light goes. On a dark path, a broad, even beam can reveal potholes without leaving harsh gaps. In traffic, a focused beam helps you see farther, while careful aiming reduces glare for others. Numbers can mislead.

Check runtime at the brightness you will actually use, not only the lowest setting. A light advertised for many hours may last much less on its strongest mode. Look for clear mode-by-mode estimates, a visible battery indicator, and charging that fits your routine. A quick evening ride and a long winter commute need different reserves. I’d still leave a margin; battery claims are not guarantees.

Mounting matters more than it sounds. A light that slips on a rough road is a poor choice, even if its output is impressive. Test whether the bracket fits your handlebar, seatpost, or helmet, and whether you can remove it easily. Check weather resistance, controls you can operate with gloves, and visibility from the sides. For a rear light, steady and flashing modes may suit different conditions, but neither replaces reflective details or attentive riding. Compare weight and price last, after the light fits your routes. One small frustration: no single test recreates every road.

Best Bicycle Light Choices for Different Riding Needs

Choosing among the best bicycle lights in 2026 starts with where and when you ride. On unlit roads, a front light with a shaped beam and enough output to reveal potholes offers more value than a flashy specification. Check its mount for wobble, and choose controls you can use with gloves. A narrow beam may miss road edges. Small detail, big difference.

For city commuting, prioritize side visibility, a clear rear light, and a daytime setting. Drivers approach from different angles, so side-facing visibility matters at busy junctions. A steady mode can help others judge your position; flashing modes may attract attention, but should not replace a visible beam. Choose a rear light that stays secure over cracked pavement. A light pointed at the ground is not much help.

For longer weekend rides, match battery runtime to your actual route, then leave a buffer for cold weather or slower travel. Check charging time and battery indicators before leaving; a sudden low-power warning is annoying. A helmet or secondary light can add visibility, but avoid a setup that makes controls confusing. More is not always better. It is easy to trust a high lumen number, but beam shape, runtime, mounting, and comfort determine whether a light suits your route. None fits everyone perfectly.

What Are the Best Bicycle Lights in 2026? — Best Bicycle Light Choices for Different Riding Needs

Riding Need Recommended Light Type Useful Output Range Key Features to Look For Typical Runtime Considerations Best Fit
Daytime visibility in traffic Front daytime running light plus a rear flasher Front: about 200–600 lumens
Rear: about 50–200 lumens
Distinctive pulse modes, wide-angle visibility, secure mounts, and a clear battery indicator Flashing modes generally last longer than high-output steady modes; check the runtime for the specific setting you will use Commuters and riders sharing busy roads during daylight
Well-lit city streets Compact front light with a shaped beam and a steady rear light Front: about 300–600 lumens
Rear: about 20–100 lumens
A beam that helps the rider see the road without dazzling others, multiple modes, and easy removal for charging A lower or medium steady setting can provide a useful balance between visibility and battery life Urban riding where streetlights provide most of the illumination
Unlit roads and rural commuting High-output front light with a regulated beam; add a rear light Front: about 800–1,600 lumens
Rear: about 50–150 lumens
A broad, even beam, stable handlebar mount, water resistance, and a battery indicator visible while riding High output can drain a battery quickly. Compare runtime at the intended brightness, not only the maximum-output figure Riders who need to see road edges, surface changes, and obstacles in darkness
Fast road riding Road-focused front light with a controlled beam pattern Front: about 600–1,200 lumens
Rear: about 30–150 lumens
Secure, vibration-resistant mounting, a beam suited to road use, and side visibility at junctions Choose a setting that remains bright for the full ride; cold weather can reduce rechargeable-battery performance Road cyclists riding after dark or at dawn and dusk
Off-road trails Wide-beam handlebar light, optionally paired with a helmet light Combined output: about 1,500–3,000 lumens Wide peripheral illumination, rugged mounts, water resistance, and a helmet light that follows the rider’s gaze Maximum brightness often has limited runtime. A spare battery or lower-output setting can help on longer rides Mountain bikers riding dark, uneven trails
Long rides and touring Efficient front light with a dependable rear light and charging options Front: about 400–1,000 lumens
Rear: about 30–100 lumens
Long low-mode runtime, USB-C charging, a readable battery indicator, and mounts that stay secure on rough surfaces Prioritize published runtime at a practical setting and consider whether the light can be recharged during a stop Touring, endurance rides, and multi-hour journeys
Simple backup or occasional riding Compact rechargeable front-and-rear set Front: about 100–400 lumens
Rear: about 10–50 lumens
Quick-release mounts, straightforward controls, a low-battery warning, and enough water resistance for ordinary rain Small lights usually have less battery capacity; recharge them regularly and avoid relying on maximum mode for long rides Casual riders who want a lightweight, easy-to-store set

Note: Output and runtime ranges are general selection guides, not product-specific guarantees. Actual performance varies by beam design, mode, battery condition, temperature, and manufacturer testing method. Use steady or shaped beams thoughtfully around other road users.

How to Choose and Use Bicycle Lights Safely

What Are the Best Bicycle Lights in 2026?

A useful bicycle light helps you see the road and helps others notice you. Choose a front light with a beam suited to your route: darker paths need more reach, while well-lit streets may need less. Lumens alone do not tell the whole story. Beam shape, mounting position, battery life, and ease of operation matter too. A rear light should be visible from behind and stay securely attached over bumps. Check that the light does not point into other road users’ eyes. Small adjustments make a difference.

Tips: Charge lights before each ride. Check the mount by hand. Carry a backup for longer trips. Use a steady or gentle flashing mode that remains easy to judge in traffic.

Test your lights outside before riding after dark. Make sure the front beam reaches the ground ahead, not just the sky or nearby walls. Keep lenses clean; road spray can dim them surprisingly fast. In rain or cold weather, battery performance may change, so check the indicator during longer rides. Reflective details on clothing can improve visibility from the side, but they do not replace working lights. I have sometimes trusted a full battery indicator too much; it is worth checking the actual beam, not just the display.

FAQS

Why shouldn’t I compare bicycle lights by lumens alone?

Lumens measure total output, not where the beam falls. A broad beam can reveal potholes; a focused beam reaches farther.

How should I check a light’s battery life?

Compare runtime at the brightness you will actually use. Strong settings may drain the battery much faster. Leave a margin.

What should I check before mounting a bicycle light?

Confirm the bracket fits your handlebar, seatpost, or helmet. Give it a firm hand check. A slipping mount is frustrating.

How do I aim a front light?

Point its beam onto the road ahead, not into other people’s eyes. Test it outdoors after dark. Small adjustments help.

What makes a rear light useful?

It should stay attached over bumps and remain visible from behind. Side visibility matters too. Reflective details can help.

Do flashing modes replace reflective clothing?

No. Reflective details may improve side visibility, but they do not replace working lights. Choose a mode that is easy to judge in traffic.

How can I keep my lights working in bad weather?

Check weather resistance and clean the lenses after road spray. Rain and cold may affect battery performance. Check the indicator on longer rides.

What should I do before a long ride?

Charge the lights, inspect the mounts, and carry a backup. Check the actual beam, not only the battery display. I have trusted that display too much.

Conclusion

Choosing the best bicycle lights in 2026 starts with understanding how they help riders see the road and make themselves more visible to others. Front lights illuminate the path ahead, while rear lights signal a rider’s presence; compact side or helmet lights can offer extra visibility for particular routes. The right setup depends on where and when you ride, from well-lit city streets to darker roads and trails.

When comparing a Bicycle Light, consider brightness, beam shape, battery life, charging method, mounting stability, weather resistance, and ease of use. A commuter may prefer a dependable light with long runtime and simple controls, while a trail rider may need a stronger beam and secure mounting. Whatever the riding style, choose lights that suit the conditions, check their charge before setting out, aim them thoughtfully, and keep them clean and firmly attached. Using front and rear lights together can help improve visibility without distracting other road users.

Ethan

Ethan

Ethan is a professional marketing specialist with a strong understanding of the company’s products, their practical applications, and the needs of the customers they serve. He regularly contributes expert articles to the company website, sharing clear, useful insights that help readers make......
Send Inquiry